


Edit Automotive Pictures in Lightroom
Unedited automobile footage can typically lack coloration and emotion. Typically it is as a result of they had been shot with the unsuitable digital camera settings, or just because the picture is straight out of the digital camera and hasn’t been edited but.
Our answer might be discovered utilizing the modifying instruments discovered within the develop module of Lightroom. Every adjustment you make can remodel the look of the picture, good or unhealthy. So what’s one of the simplest ways to edit automobile images?
On this tutorial, I present you 4 simple steps to rework any automobile image from a boring RAW file to a digital masterpiece! The main focus right here is to make the automobile mix properly with the atmosphere but in addition have it stand out as the topic of the picture. Let’s start!

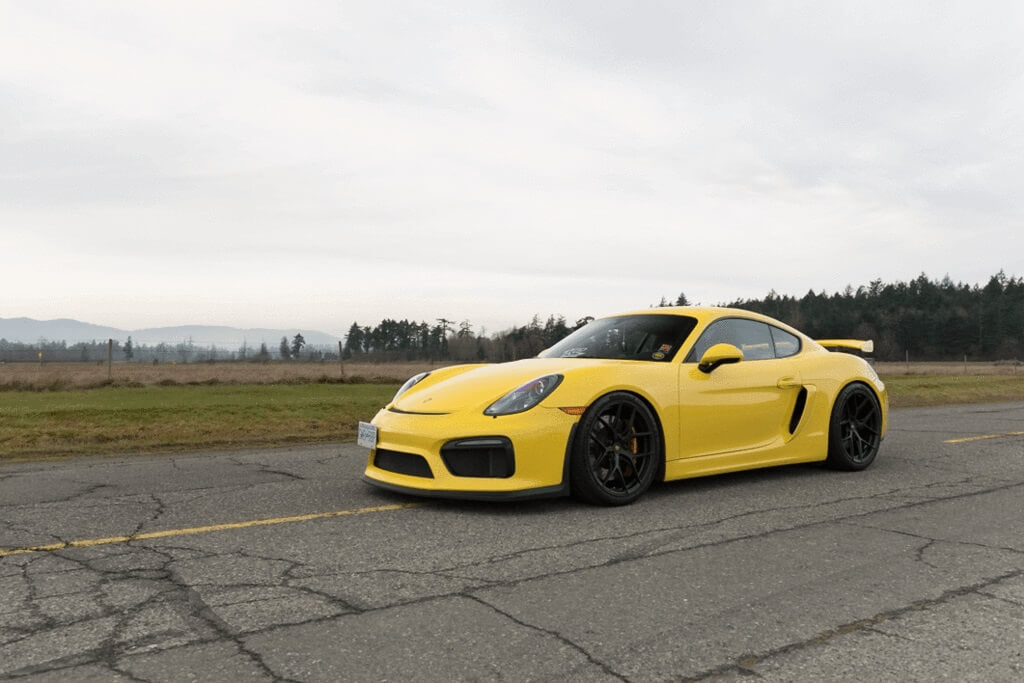
Right here is my authentic, straight out of digital camera picture:
Step 1: Take Care of The Fundamentals
I start my modifying course of within the Fundamental part of the develop module. This half is what I wish to name the “meat of the burger” as a result of we handle the bottom publicity that decides the primary look of the picture.
Begin on the high of the Fundamental Panel by adjusting the white steadiness first. For the reason that authentic picture is a bit inexperienced and heat, I’ll decrease the temperature to 5600 and enhance the tint to 10.
The entire different sliders beneath these two, from publicity to saturation, might be adjusted primarily based in your private choice. Simply be certain that to not go overboard with growing the publicity, highlights, or whites an excessive amount of, otherwise you might lose priceless particulars like coloration and texture.
rule of thumb is to maintain the readability beneath 30, however above 0. Abusing the readability slider will outcome within the picture being too dramatic, which may look unprofessional. When unsure, make your changes moderately.

Step 2: Coloration Changes
Now it’s time to make detailed changes to every of the colours. Click on on the “HSL/Coloration/B&W” icon after which on “All” to indicate all the colours. For these changes, I’ll start on the high and work my method down:
Crimson – I Added a little bit of saturation to make brake calipers pop extra.
Orange – There’s nothing actually orange on this image, so I skipped it.
Yellow – I elevated the saturation to indicate off how cool the paint coloration is. However I really introduced the luminance (brightness) down a notch to take care of the integrity of the paint shade.
Inexperienced – The grass within the again is just too inexperienced for the look I’m going for, so I moved the hue slider all the way down to full yellow to fully take away the saturation of this coloration. Then I added some luminance so the grass wasn’t too boring.
Aqua – I barely elevated the hue to successfully scale back the teal tinge of the home windows.
Blue, Purple, and Magenta – For this picture, I ignored them.

Subsequent, I’ll use the Coloration Grading Panel to completely change the texture of this automobile photograph. The way it works is that you simply transfer the small circle inside every of the bigger circles to decide on the hue and quantity of saturation you need to add to that specific a part of the picture. There are circles for the highlights, midtones, and shadows. Retaining the small circle near the center will apply a hue with little or no saturation. Transferring the circle nearer to the periphery will apply far more saturation.
On this case, I selected to make the highlights heat and the shadows blue. I by no means contact the Stability slider, as that simply makes the whole lot extra sophisticated.
The number of colours relies on coloration concept, which is a separate course by itself. However on the finish of the day, select no matter pleases your eye essentially the most. Personally, I wish to preserve the highlights yellow/orange and the shadows blue, as that mixture appears to be like essentially the most pure.

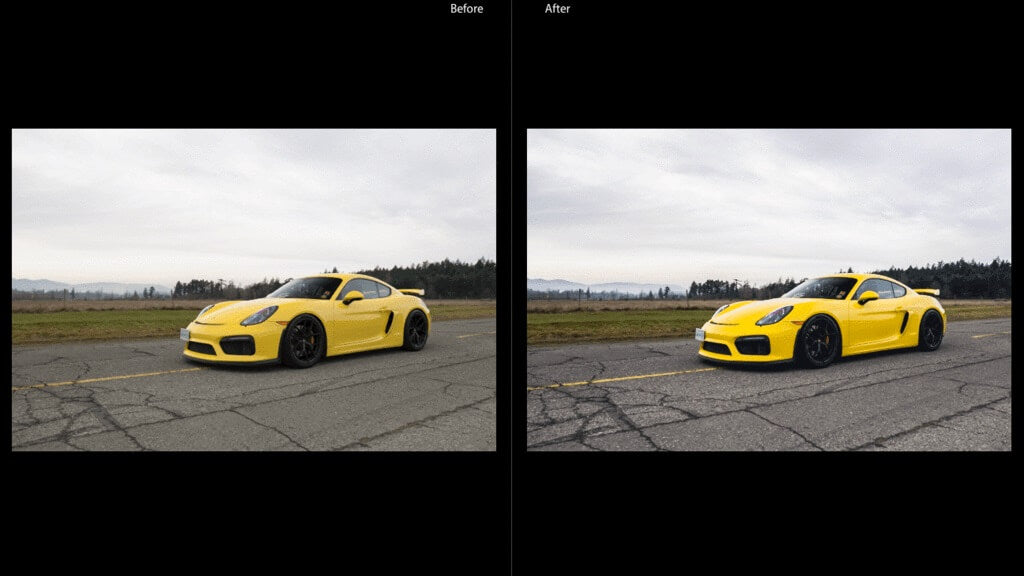
You possibly can see above that the picture now appears to be like far more refined by way of publicity and coloration. Nonetheless, it nonetheless lacks the punch that makes it a ultimate product.
That’s the place the linear gradient instrument (previously known as the graduated filter) is available in:
Step 3: Make the most of Linear Gradients (Previously Graduated Filters)
In my view, what units an incredible automobile photograph aside from abnormal ones is how a lot the automobile stands out from the background. As a result of in spite of everything, it’s the predominant topic!
In the event you’re taking images of a automobile, chances are high it’s on a street. An environment friendly approach to make the auto stand out AND add drama to your picture is to make each the street and the sky darker. This may be achieved in Lightroom through the use of the Linear Gradient Software.
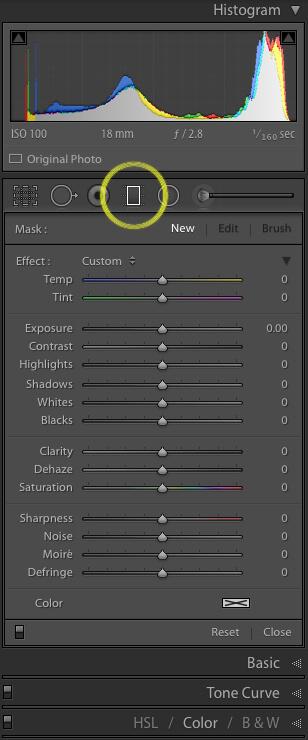
Linear Gradients are discovered within the Masking Panel. To entry them, click on on the Masks icon (circle icon with a dotted define) within the toolbar situated above the Fundamental Panel and beneath the Histogram Panel.
When you’ve got no present masks in your picture, whenever you click on on the icon a listing of choices will open and you’ll select the Linear Gradient instrument. When you’ve got already utilized masks to your picture, click on on the “+” button on the high of the Masks Panel that opens after which select Linear Gradient.

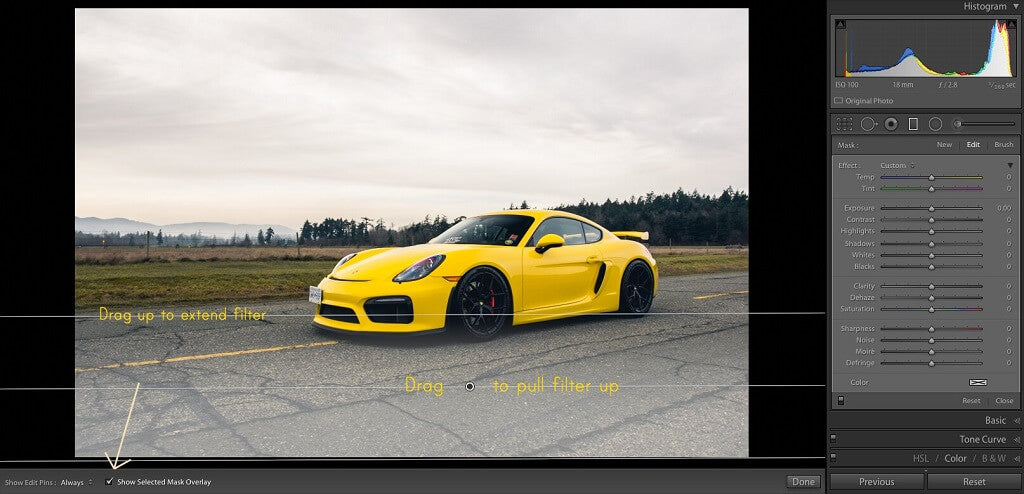
After you have chosen the Linear Gradient instrument, drag in your picture from the underside of the picture as much as the automobile. You’ll now see three white traces with a black dot within the center.
Drag the center line to maneuver the filter and the highest line to regulate the size of the filter. Click on “O” in your keyboard to indicate the chosen overlay of the filter you made – it’s best to see the arrow by “Present Chosen Masks Overlay” ticked. For this linear gradient, I’ll lower the publicity to -1.50 to make the bottom a bit darker.
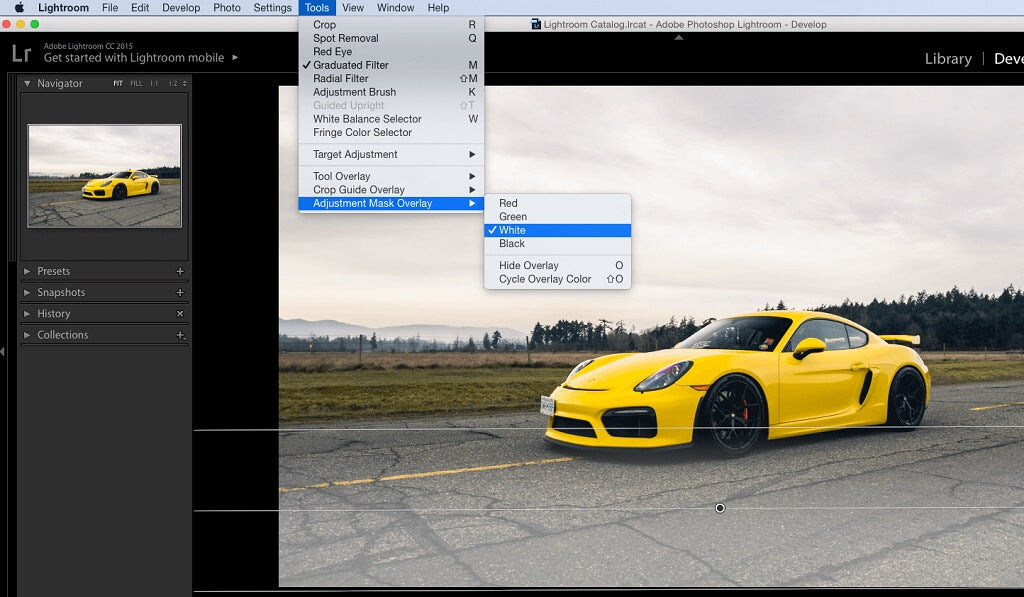
You possibly can really change the Overlay coloration in Lightroom by going as much as the menu bar of your display, clicking on “Instruments”, and hovering over “Adjustment Masks Overlay”. You possibly can see there are 4 colours (crimson, inexperienced, white, black) to select from. The colour you select isn’t an enormous deal, nevertheless it’s greatest if it’s separable from the a part of the picture you’re engaged on.
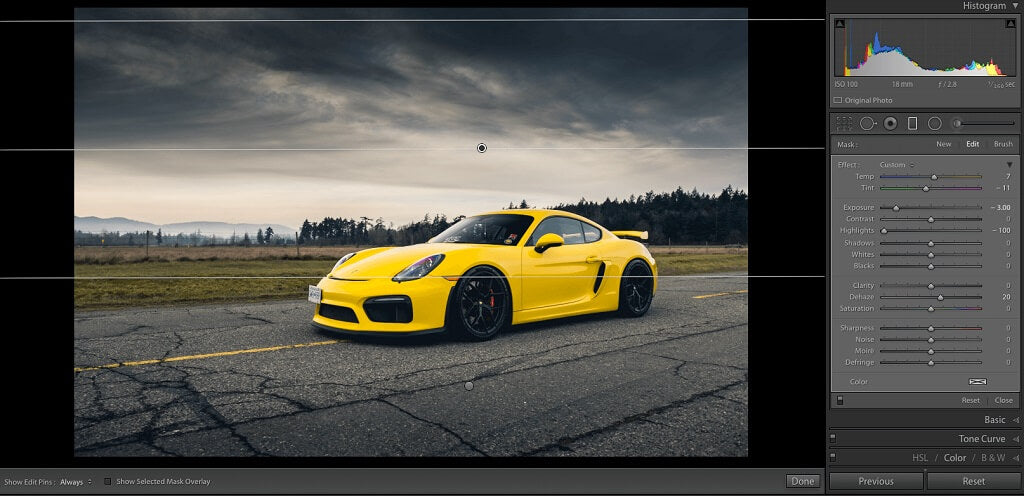
Subsequent, I’ll create one other linear gradient, this time for the sky. For the reason that clouds are fairly boring, I need to darken them considerably so as to add extra drama whereas additionally bringing extra focus to the automobile.
With this gradient, I fully lowered the highlights, pulled down publicity, eliminated a little bit of haze, and added a touch of warmness to enhance the yellow paint. The aim right here is to attract the viewer’s eye to the automobile, whereas on the identical time, sustaining the pure look of the atmosphere.
Step 4: Remaining Touches Utilizing the Brush Software
Now the automobile picture appears to be like spot on and the edit is sort of full. Nonetheless, I need to add some ending touches by darkening the aspect home windows and boosting the distinction of the wheels utilizing the Brush instrument.
The Brush instrument can be situated within the Masking Panel. You possibly can entry it in the identical method that you simply accessed the Linear Gradient. As a substitute of selecting Linear Gradient from the choices that open, click on the “Brush” possibility.


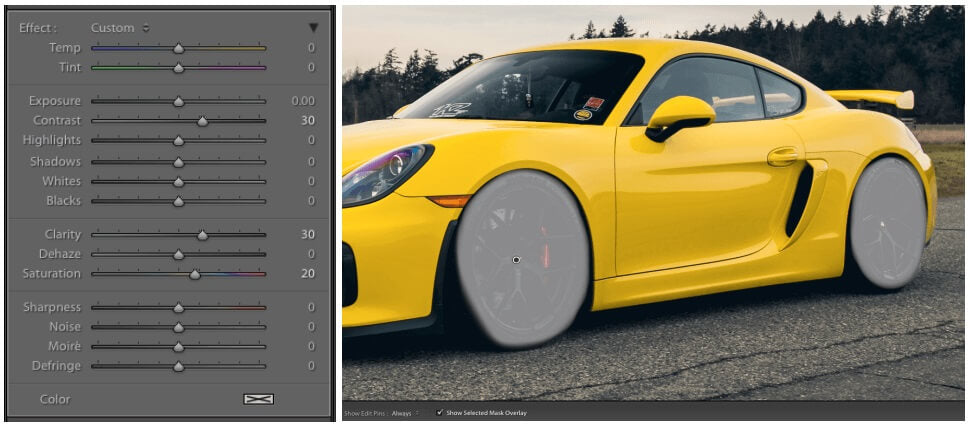
For the comb settings, I preserve the movement/density at 100 and the feather at 20. The comb measurement completely relies on how a lot element you’re working with – for this picture, I left it at 17.

To enhance the distinction of the wheels, I elevated the readability, saturation, and naturally, the distinction of my adjustment brush. The choice doesn’t must be completely spherical, however be certain that to not brush over the automobile paint or the street.
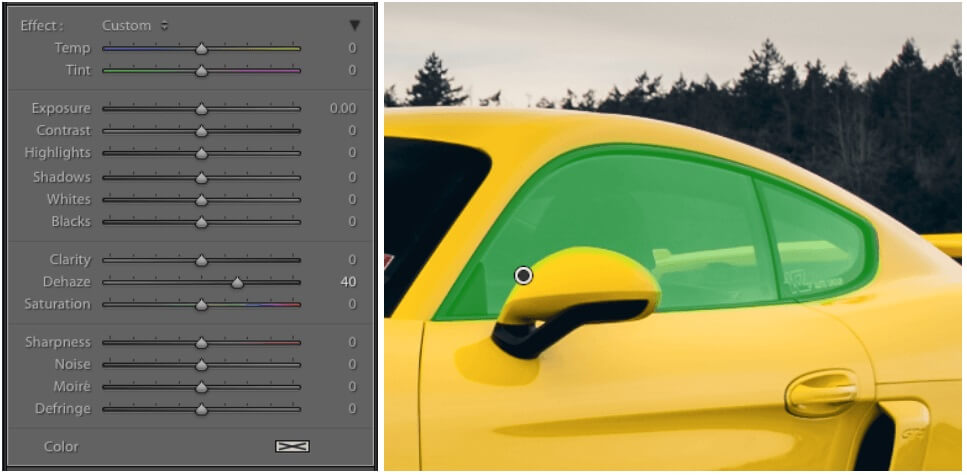
Darkening the aspect home windows is straightforward. Simply make your choice after which enhance the Dehaze slider. Do not rush this step. Be certain your choice is sort of correct – by overlaying the whole window however nowhere else.
Conclusion
In simply 4 steps, you possibly can completely alter the feel and appear of any automobile photograph. The great thing about this course of is that it may be utilized to any car picture (motion or static) and might be personalized to suit your private type.
And since Lightroom is non-destructive, you possibly can all the time undo any adjustments you made to your picture. I hope you discovered this tutorial helpful!
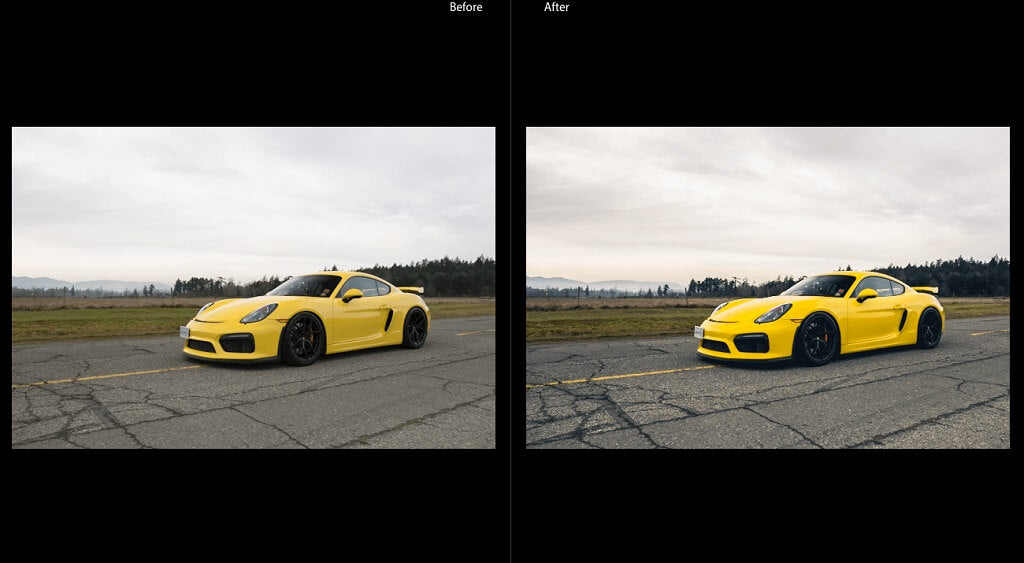
Listed below are my ultimate earlier than/after photos:

Do you could have any questions or feedback about Edit Automotive Pictures in Lightroom? Depart us a remark beneath – we might LOVE to listen to from you! And PLEASE SHARE this submit utilizing the social sharing buttons (we actually recognize it)!


Post a Comment
0 Comments